Eliminate Manual Invoice Processing With The AI Builder
Jan 06, 2025So, we've discussed what the AI Builder is and what makes it special, but how can it help you?
There's been an all-too-common problem plaguing businesses for many years that most of us would be happy to see the back of...
Manual processing.
Manual processing costs for some businesses are reported to be up to 25% business revenue! (https://spaexecutive.com/2023/10/06/the-business-cost-of-manual-processes-may-be-25-of-your-revenue/).
That's a lot of money. Not to mention the sheer amount of investment it can take to hire and train people to process your documents.
Now, I'm not here to ruin your Saturday and get you thinking about all the money that is being thrown away (even though it's quite sad), I'm here to tell you there's a better way.
With Microsoft's AI Builder solution, automating document processing has never been easier. Using the Document Processing models we have available to us, including both Prebuilt and Custom Models, we are able to process documents within seconds rather than minutes, and populate the data extracted into our databases.
In this article, I will show you how you can automatically extract an invoice, using the Invoice Processing Prebuilt Model, and populate the extracted data into your data source (which in this case will be Excel).
What do we want to achieve?
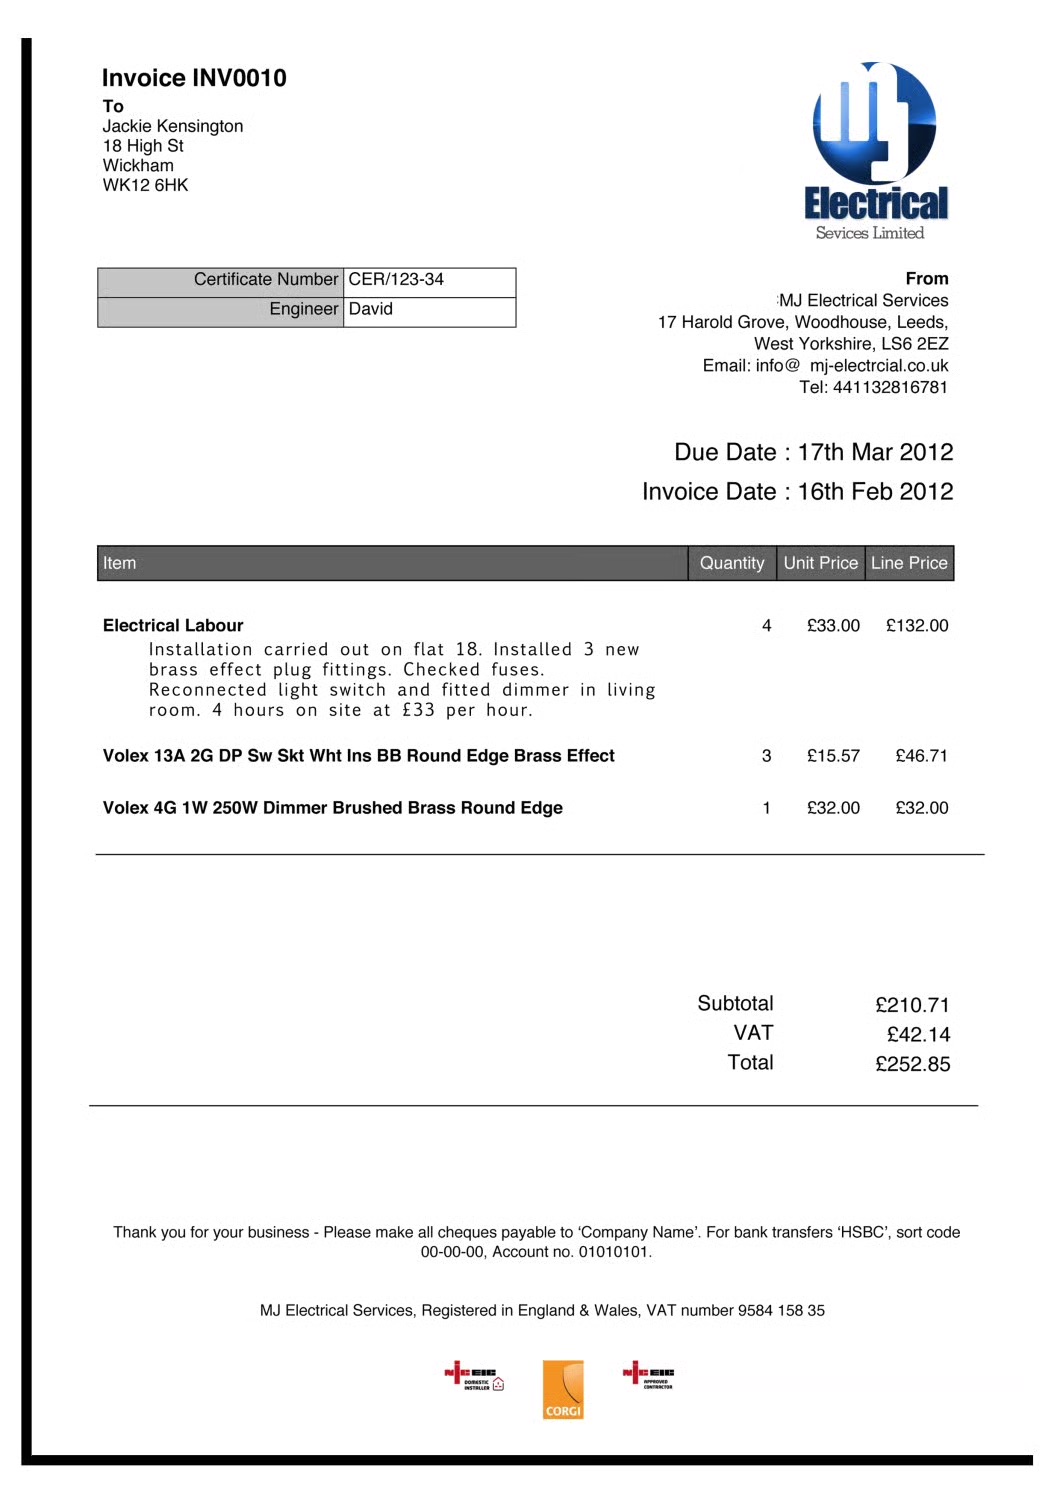
Very simply, I have my invoice:
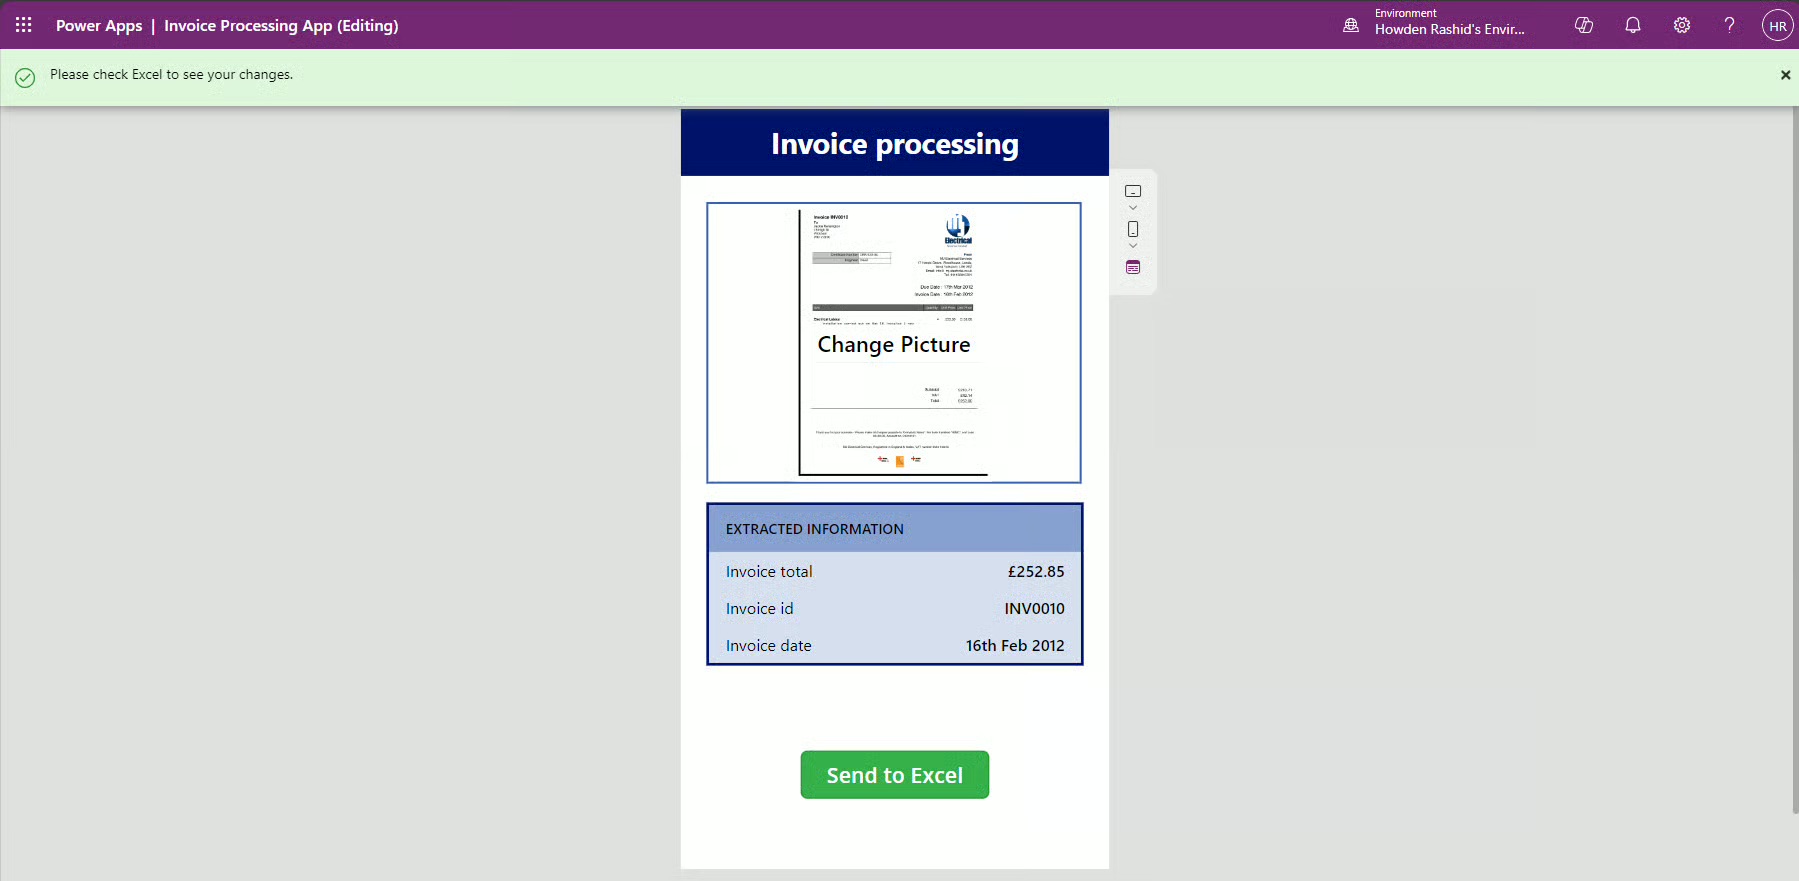
I want to be able to upload an image of my invoice to a Power App to see the data its extracted, and send that data to Excel with a click of a button:

How do we achieve it?
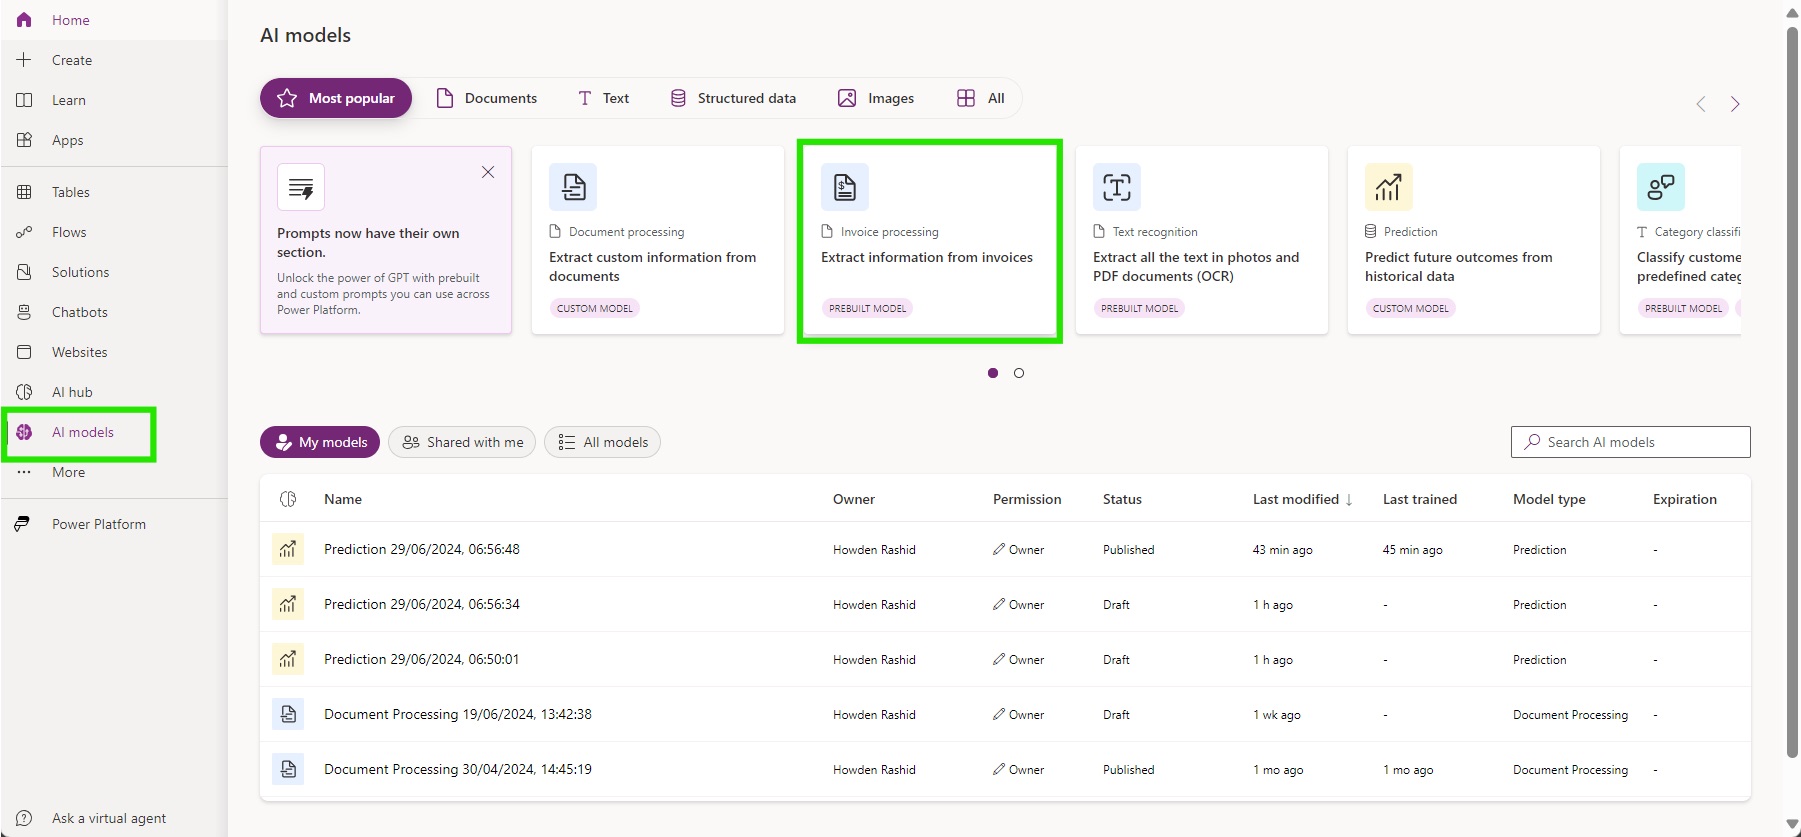
To begin, navigate to the AI Model Studio within your Power Apps Home Screen (make.powerapps.com).
When you are in the AI Models section, select 'Extract Information from Invoices'.
Once you've selected the model, you should see the pop up below. Select 'Use prebuilt model', and then select 'Use in an app'.
(Please note you can also 'Create a custom model' if the prebuilt model doesn't meet your requirements, for more information see here)

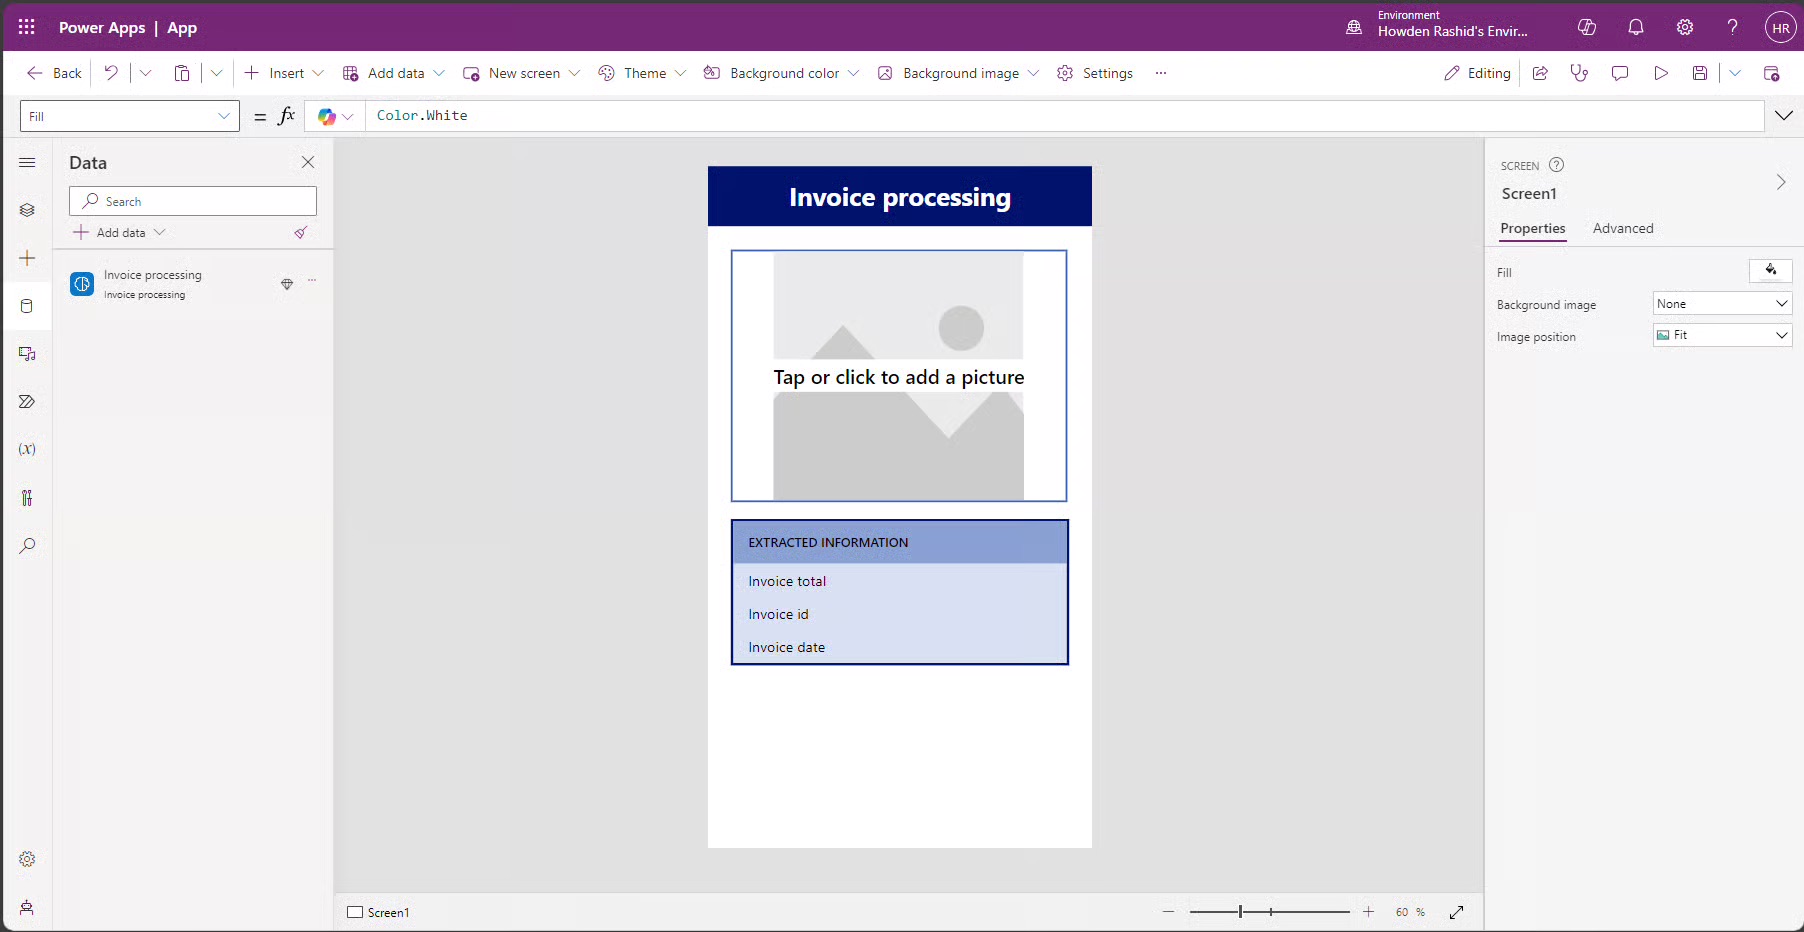
You now have a prebuilt app created with a click of a button! Nice.
We now want to extend this app to populate the data it collects to the Excel Spreadsheet.
To do this, we're going to add a button:
So, we've discussed what the AI Builder is and what makes it special, but how can it help you?
There's been an all-too-common problem plaguing businesses for many years that most of us would be happy to see the back of...
Manual processing.
Manual processing costs for some businesses are reported to be up to 25% business revenue! (https://spaexecutive.com/2023/10/06/the-business-cost-of-manual-processes-may-be-25-of-your-revenue/).
That's a lot of money. Not to mention the sheer amount of investment it can take to hire and train people to process your documents.
Now, I'm not here to ruin your Saturday and get you thinking about all the money that is being thrown away (even though it's quite sad), I'm here to tell you there's a better way.
With Microsoft's AI Builder solution, automating document processing has never been easier. Using the Document Processing models we have available to us, including both Prebuilt and Custom Models, we are able to process documents within seconds rather than minutes, and populate the data extracted into our databases.
In this article, I will show you how you can automatically extract an invoice, using the Invoice Processing Prebuilt Model, and populate the extracted data into your data source (which in this case will be Excel).
What do we want to achieve?
Very simply, I have my invoice:

I want to be able to upload an image of my invoice to a Power App to see the data its extracted, and send that data to Excel with a click of a button:

How do we achieve it?
To begin, navigate to the AI Model Studio within your Power Apps Home Screen (make.powerapps.com).
When you are in the AI Models section, select 'Extract Information from Invoices'.

Once you've selected the model, you should see the pop up below. Select 'Use prebuilt model', and then select 'Use in an app'.
(Please note you can also 'Create a custom model' if the prebuilt model doesn't meet your requirements, for more information see here)


You now have a prebuilt app created with a click of a button! Nice.
We now want to extend this app to populate the data it collects to the Excel Spreadsheet.
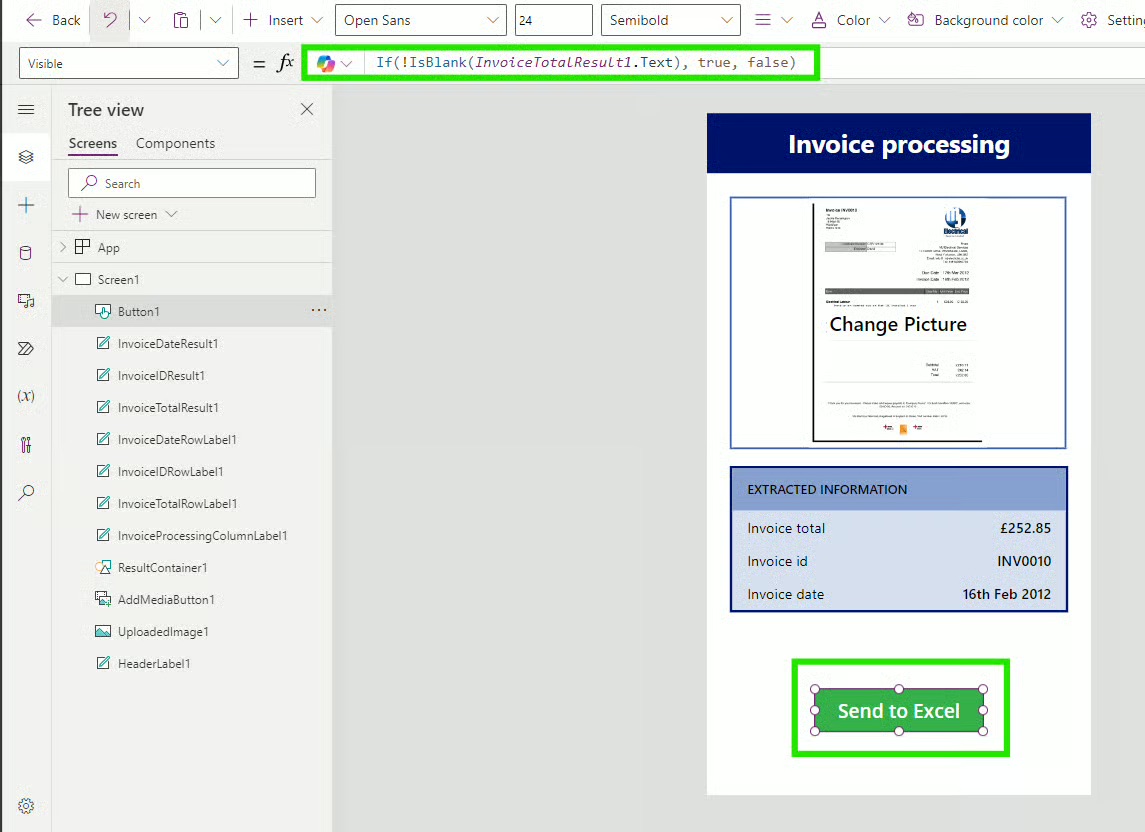
To do this, we're going to add a button:

As you can see from the image above, on the button I've added an 'If' statement which hides the button if text hasn't been analysed, since there wouldn't be any data to send to Excel.
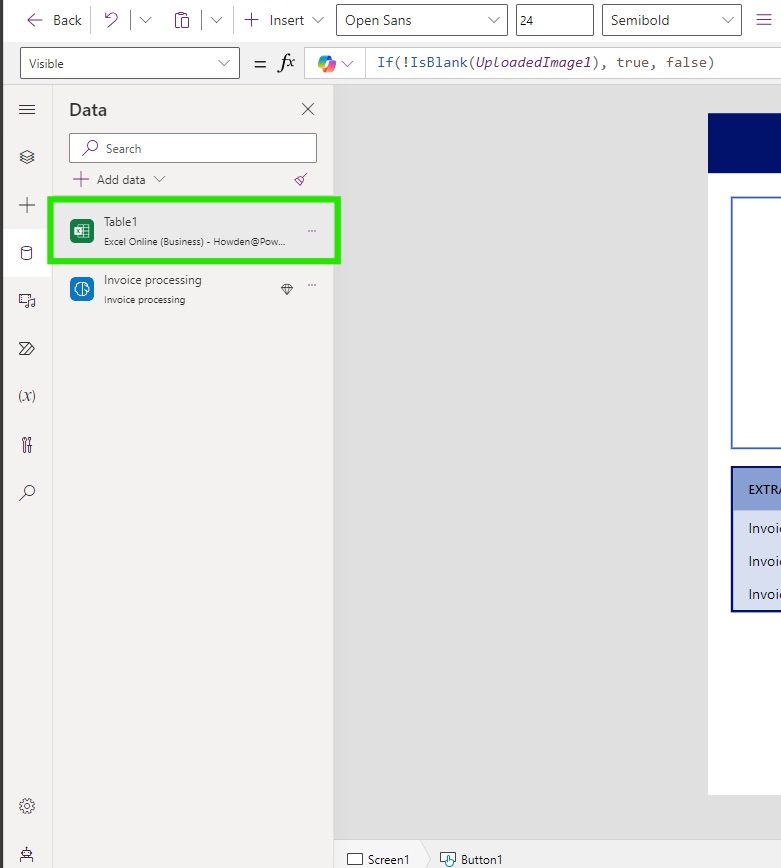
Now we're going to add Excel as a Connector so we can access the spreadsheet through our app.
To do this, navigate to the left side bar, select 'Data', '+ Add data', and search for the 'Excel Online (Business)' data source. You will then be prompted to connect.
(Please note, since this is an Excel Online connection your file will need to be uploaded to the cloud, OneDrive is a good place to start).

Once your table has been added to your app, you should see it on the left hand side.
Now the bulk of this work will be handled by the button and the following code written in the 'OnSelect' property of the button.
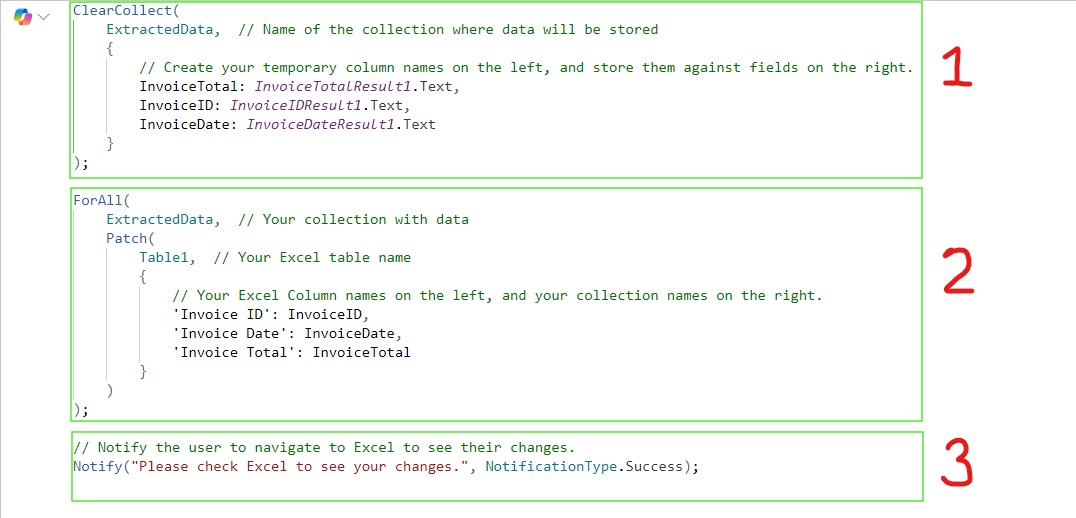
1. Data that is extracted from the invoice is temporarily stored in a collection called 'ExtractedData'.
2. The data from your collection is sent to Excel using 'Patch'.
3. The user is notified and prompted to view their Excel spreadsheet to see the changes.